How To Plan a Nature Outing Using iNaturalist

Ever since moving away from my riverside apartment in Redmond, Washington, I’ve found myself missing the little moments of unexpected nature that used to punctuate my day. On my walk to work, I might spot a great blue heron standing motionless in the river. Walking to the grocery store, I’d sometimes look up just in time to watch a bald eagle settle into its nest. These lucky encounters always made my day feel extra special.
I’ve always believed that luck favors the prepared. Rather than simply wishing those moments back, I’ve started organizing opportunities to find them. I planned a nature art picnic for my friends where we spent the afternoon at a local preserve, sketching or painting whatever happened to cross our path. More recently, I wanted to make a trip to see the recently introduced silvery blue butterflies in the San Francisco Presidio. The trouble is, now that these things are not right outside my door, I have to pay an upfront cost. And once you’ve convinced a group of friends to spend an afternoon outside, or driven an hour to look for a particular species, it can be disappointing when nothing especially interesting happens.
With iNaturalist, you can use millions of observations to answer the important questions to help you plan:Where should I go? When should I go? What should I look for when I get there? iNaturalist is a free platform that combines species identification with a searchable map of millions of wildlife observations. Whether you’re looking for anything interesting, like I was for the art picnic, or searching for one particular species, like the silvery blue butterfly, here’s how to use iNaturalist to stack the odds in favor of a memorable nature encounter.
Location-first
Looking for something interesting in your neighborhood?
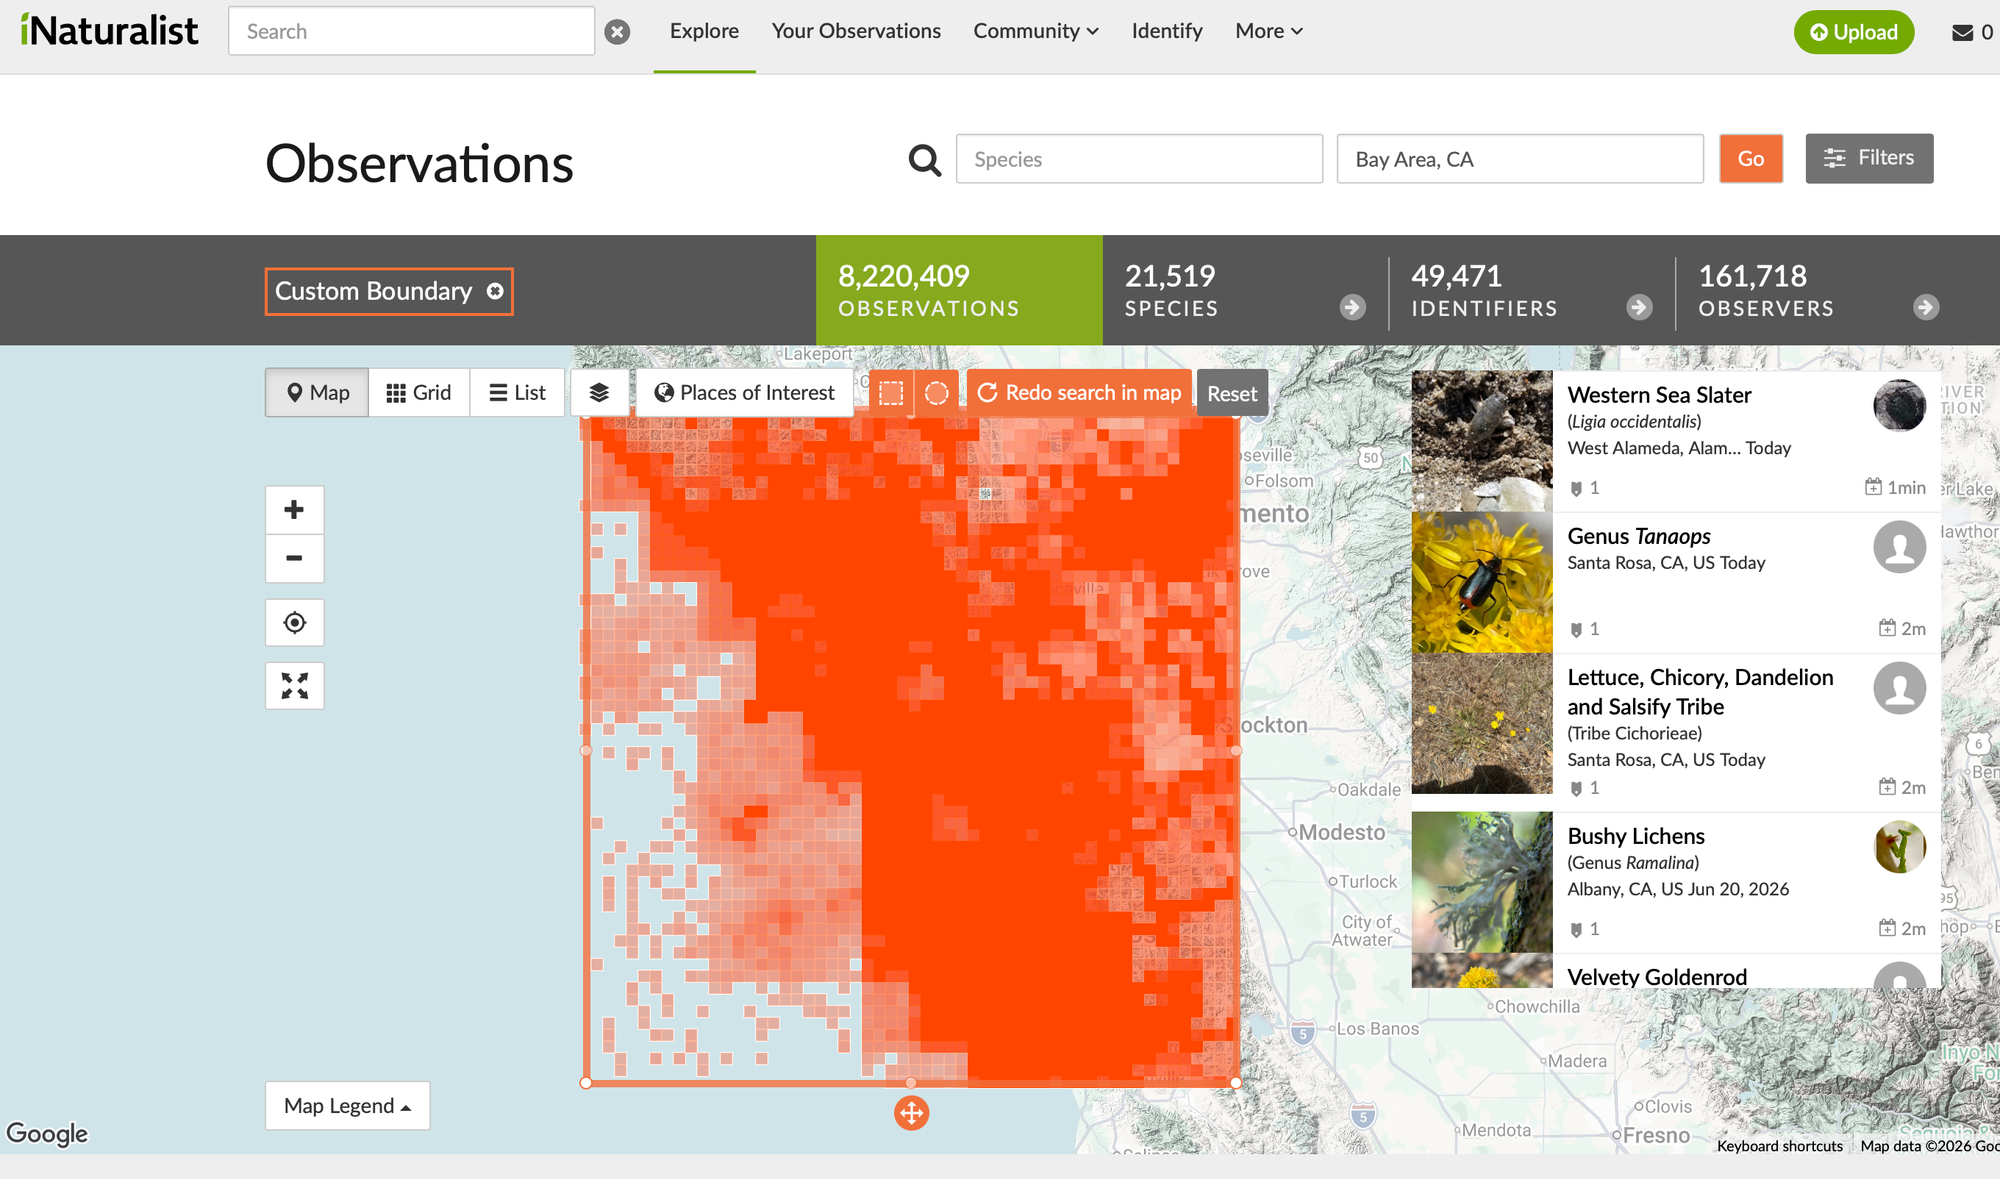
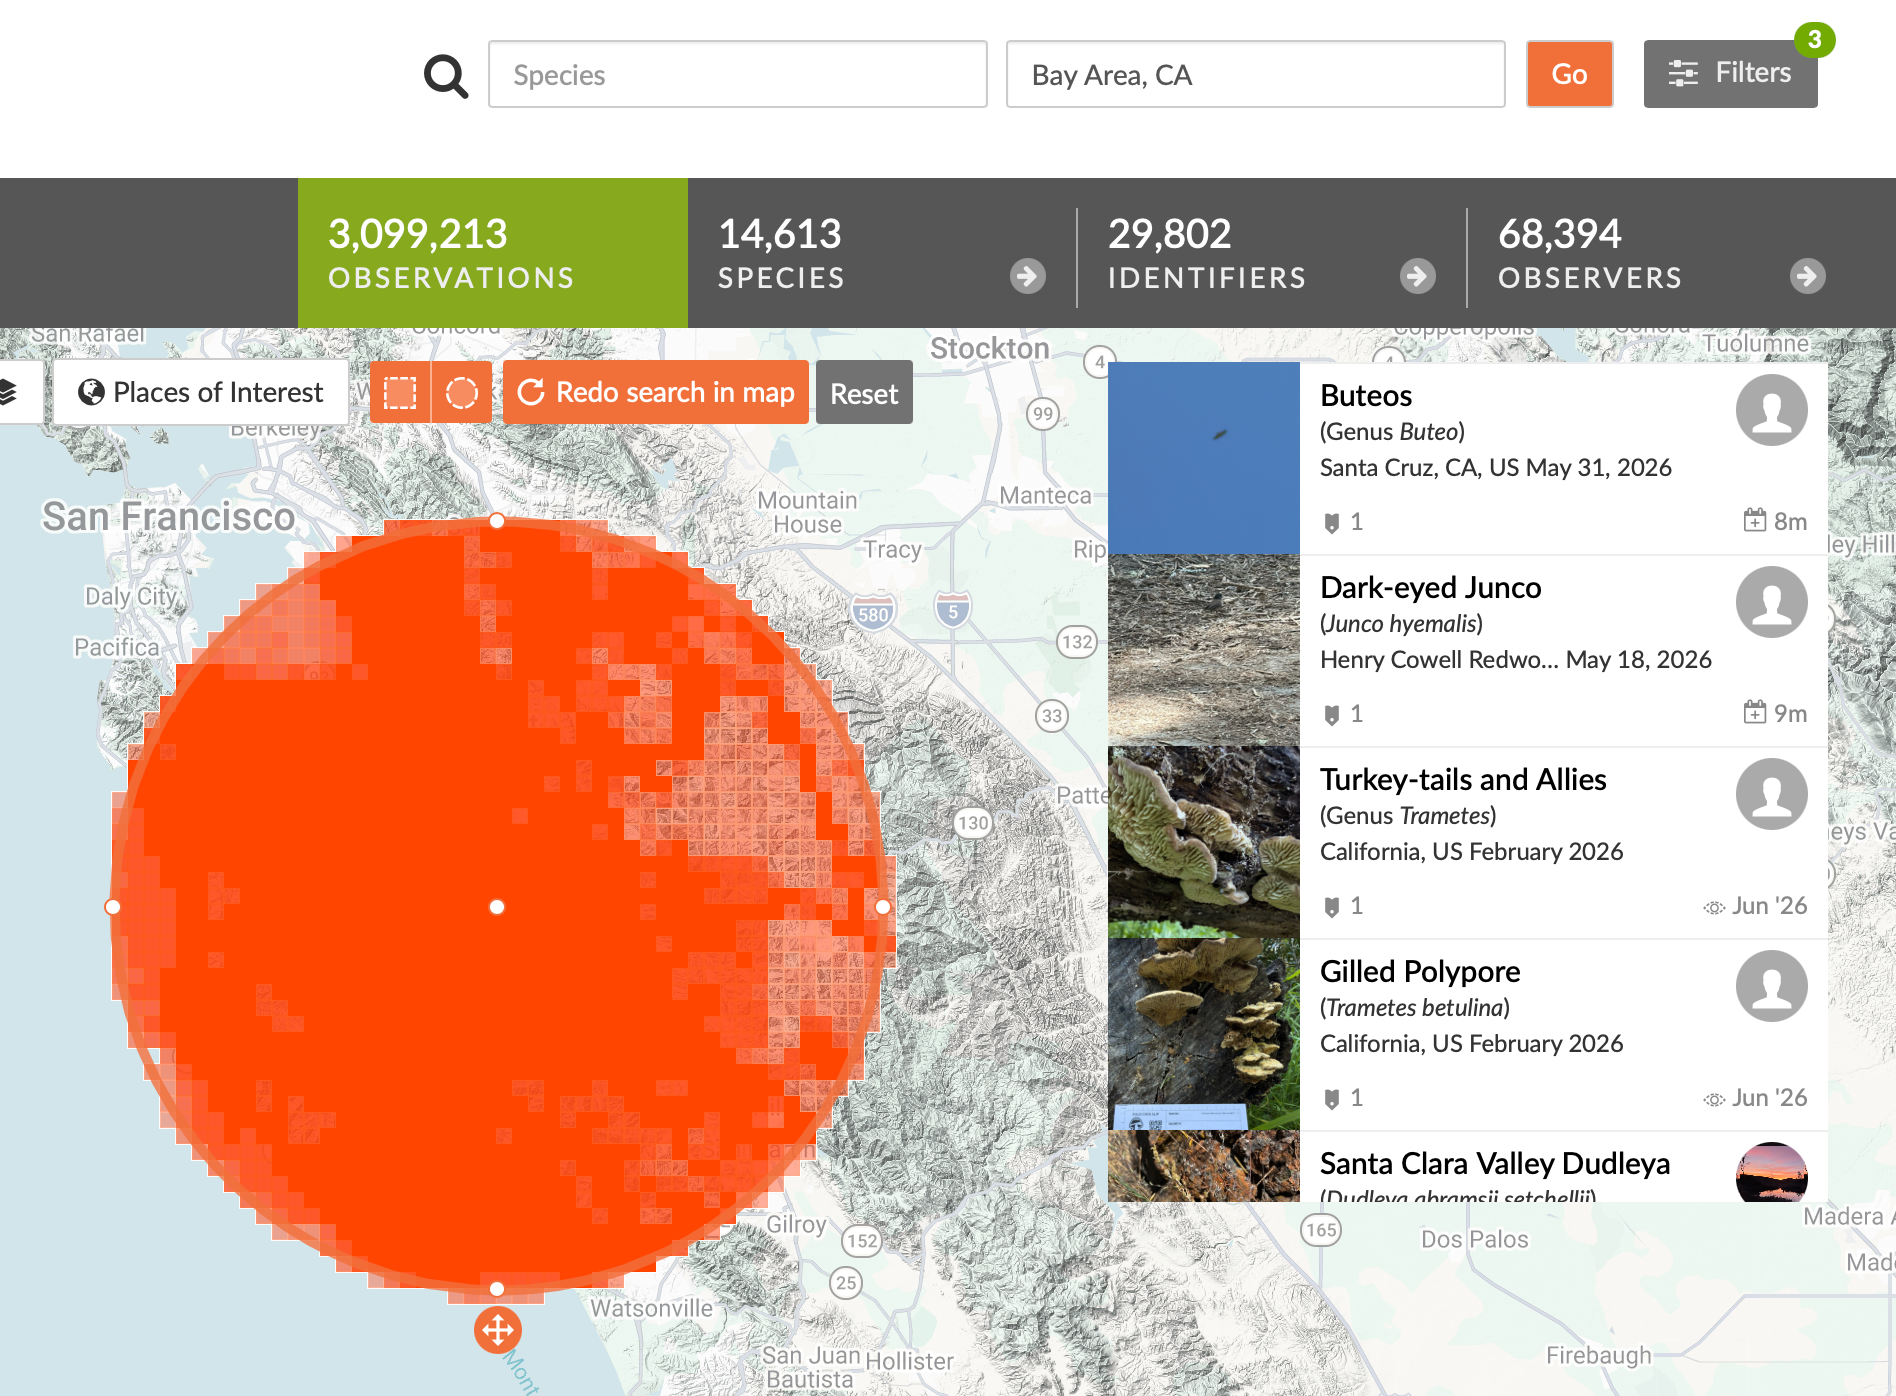
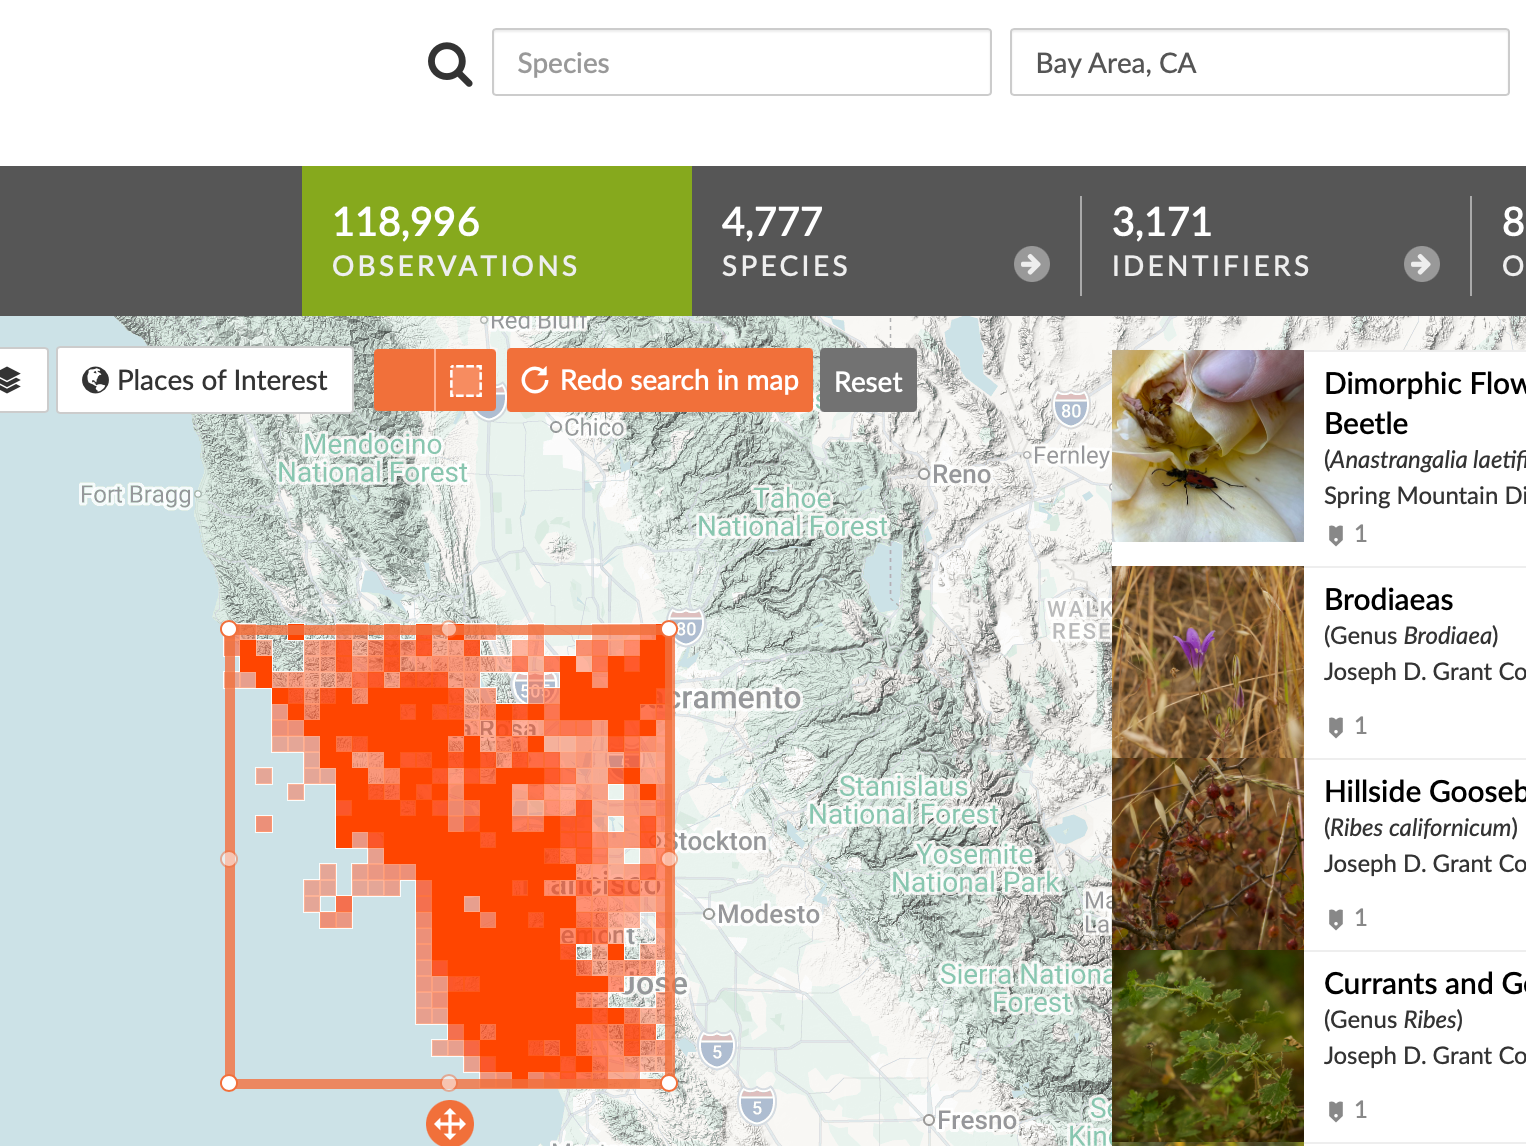
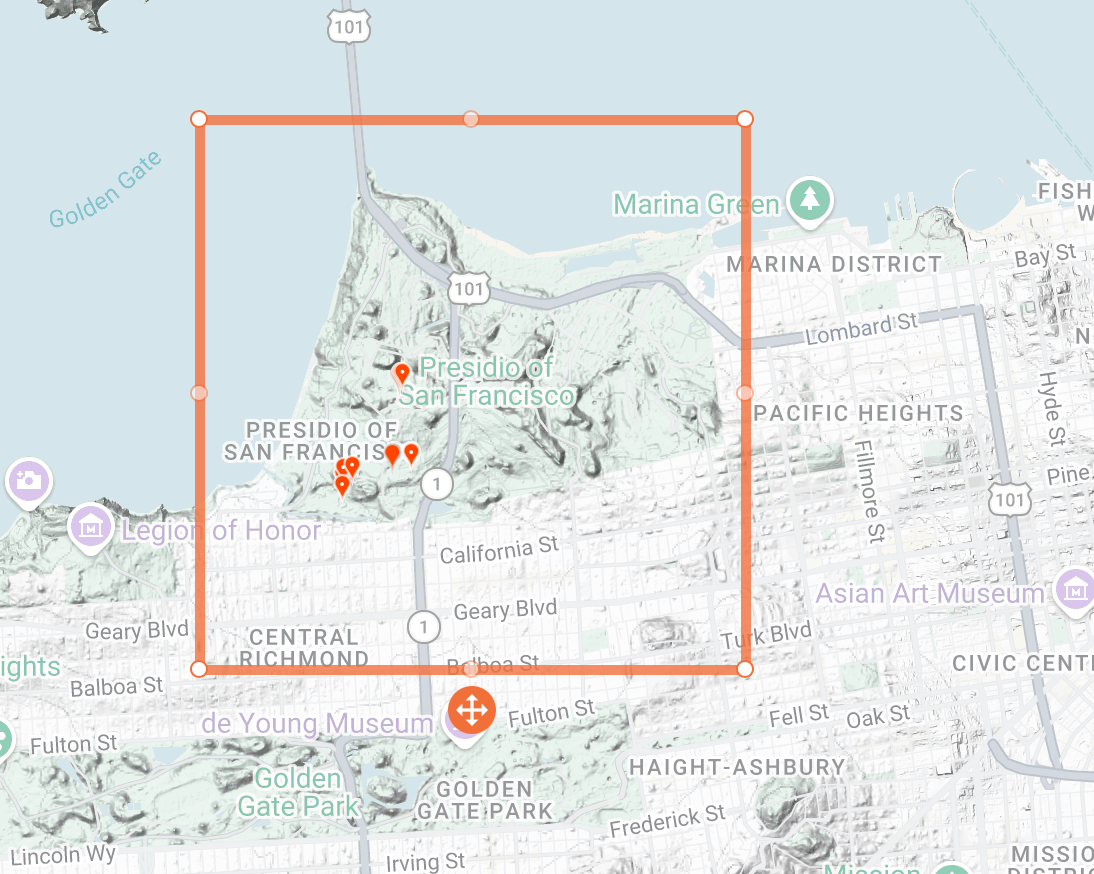
Start by opening the Explore tab and typing your general metro area into the location bar. By default, iNaturalist searches within the red square shown on the map. You can resize or drag the square to focus on a smaller area, or use the orange shape button to change your search area to a circle.
Once you have your search area dialed in, you can use the gray filter button to narrow down what types of observations you want to see.
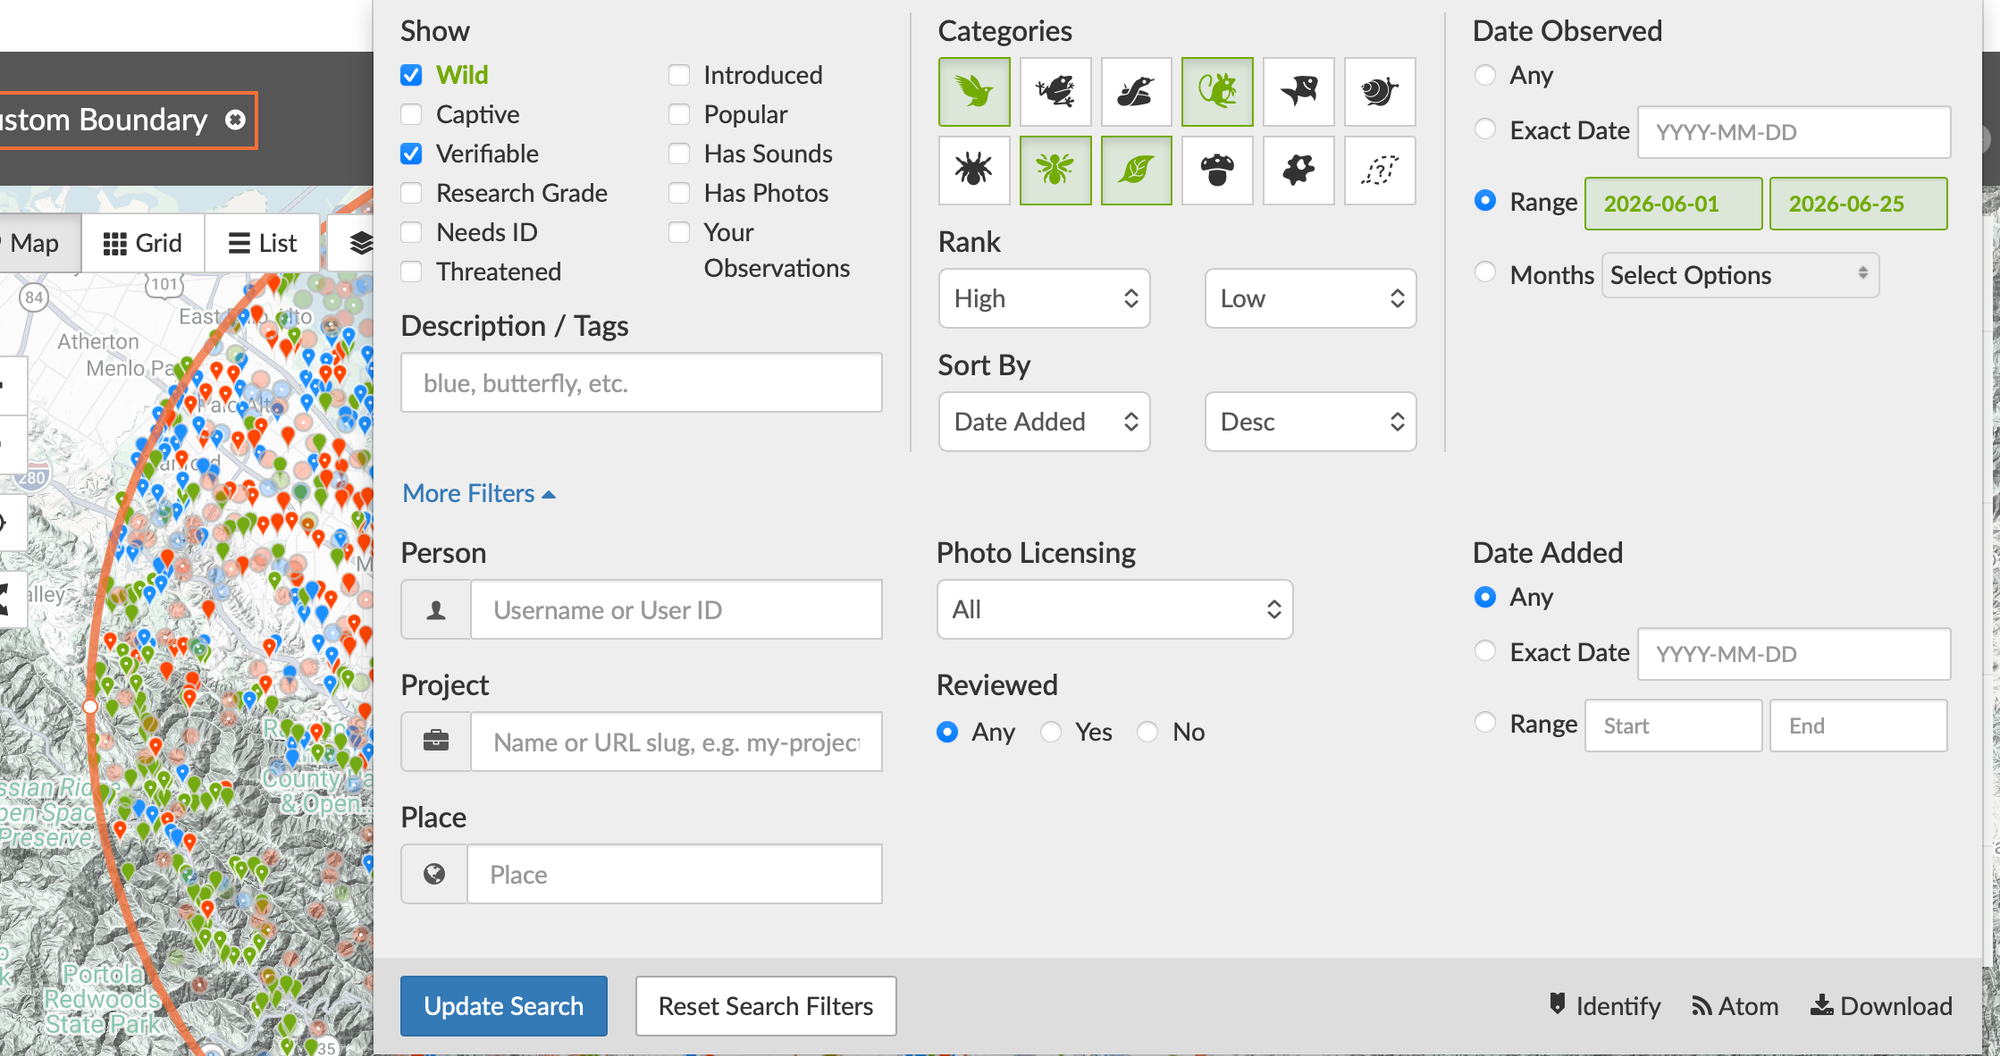
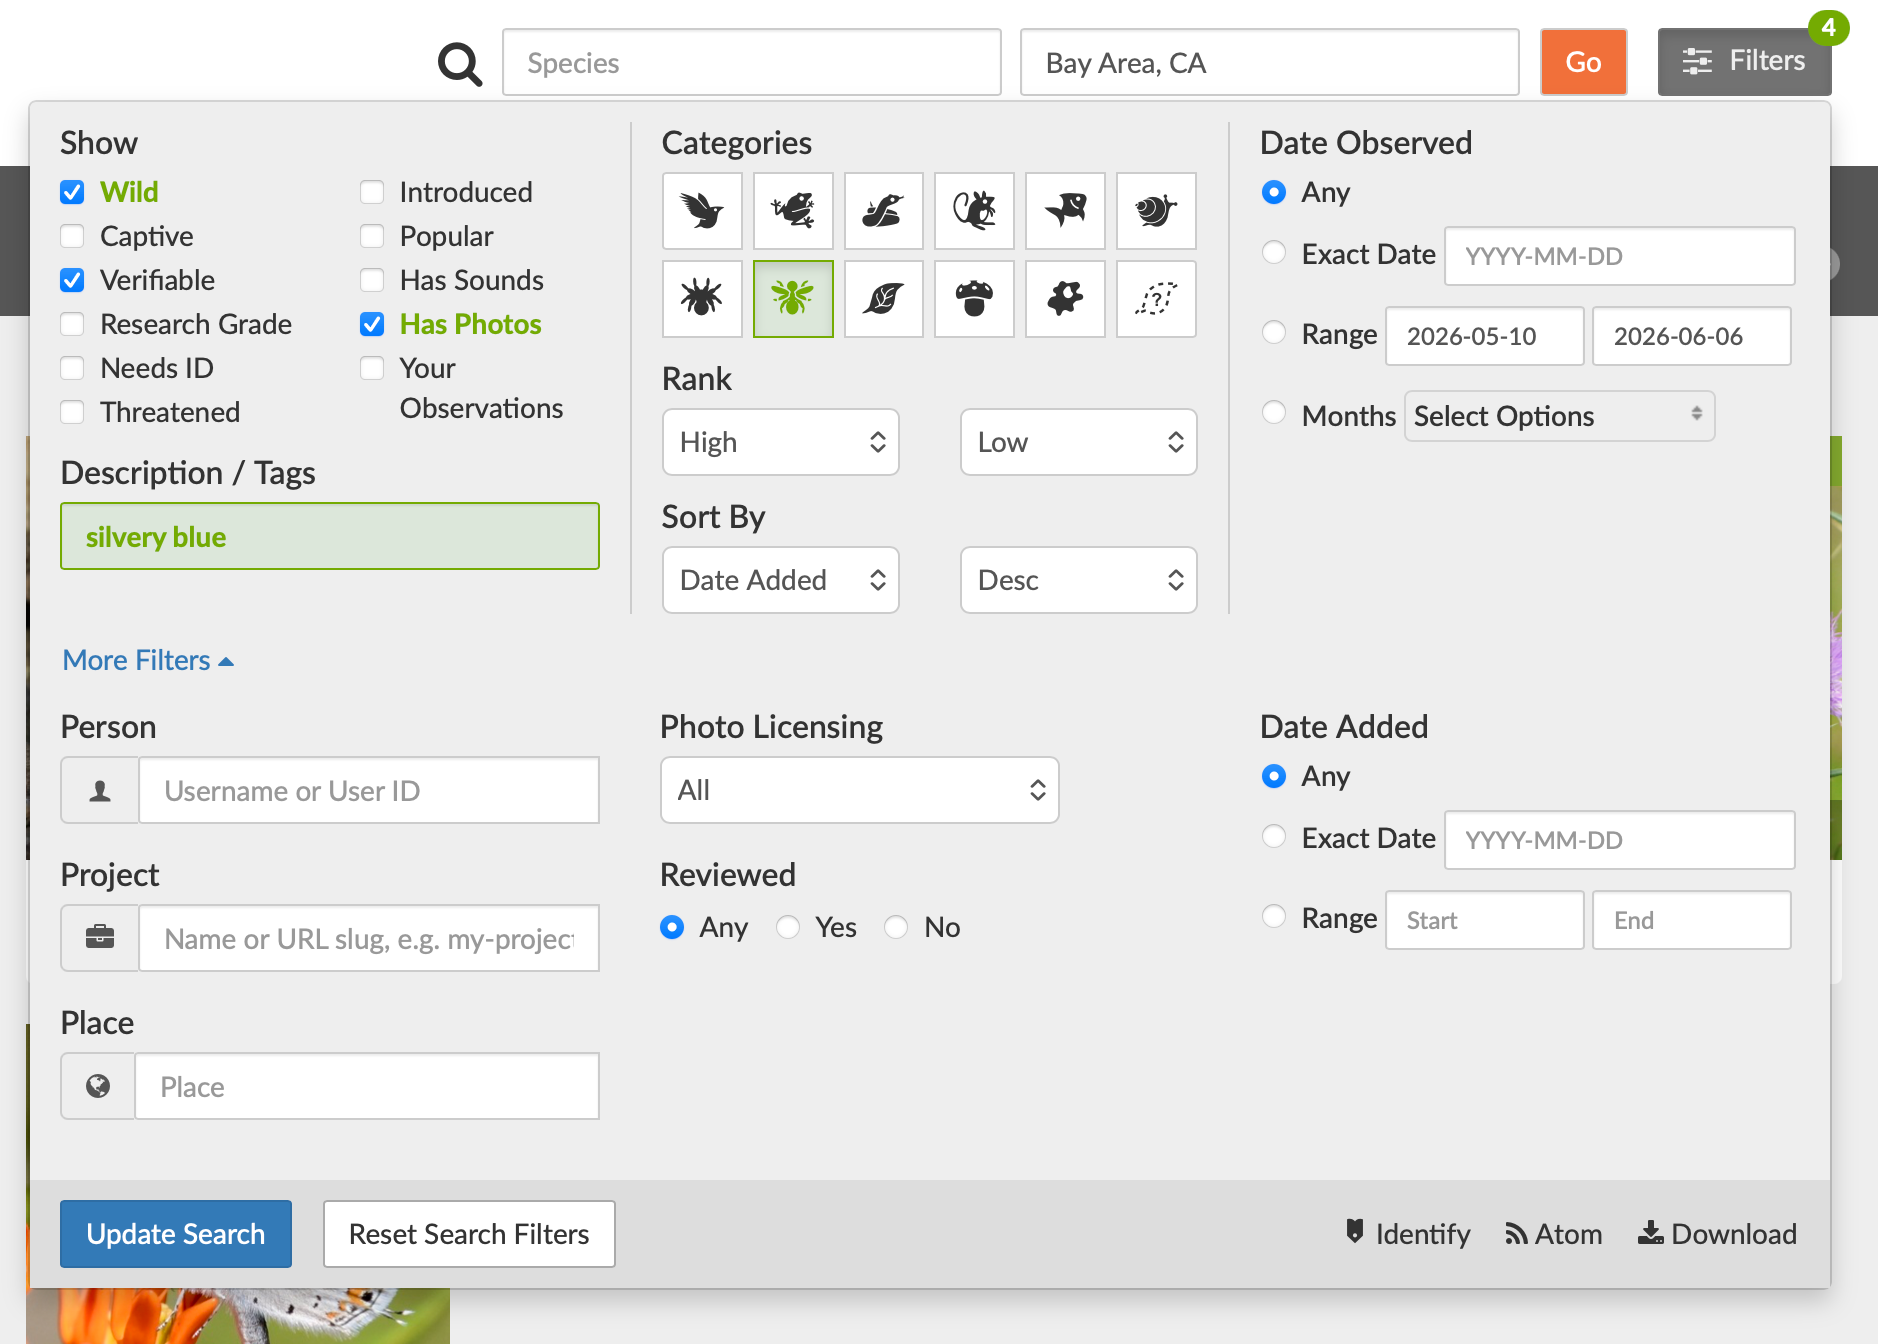
The filters menu will help you reduce the observations to only the ones that are relevant. In the filters menu, you can choose which kingdom of life that you're interested in: here, I have chosen birds, insects, plants, and mammals. Also, you can select a particular range of observation date.
For a weekend outing coming up soon, I usually compare two searches: observations from the last month, to see what’s around right now, and observations from the same month last year, to catch species that might not have been reported recently. Unfortunately, iNaturalist can’t display two date ranges at the same time, so you’ll have to run these as separate searches.
When you're finished with the filters menu, make sure to click Update Search.
How to Use the Map
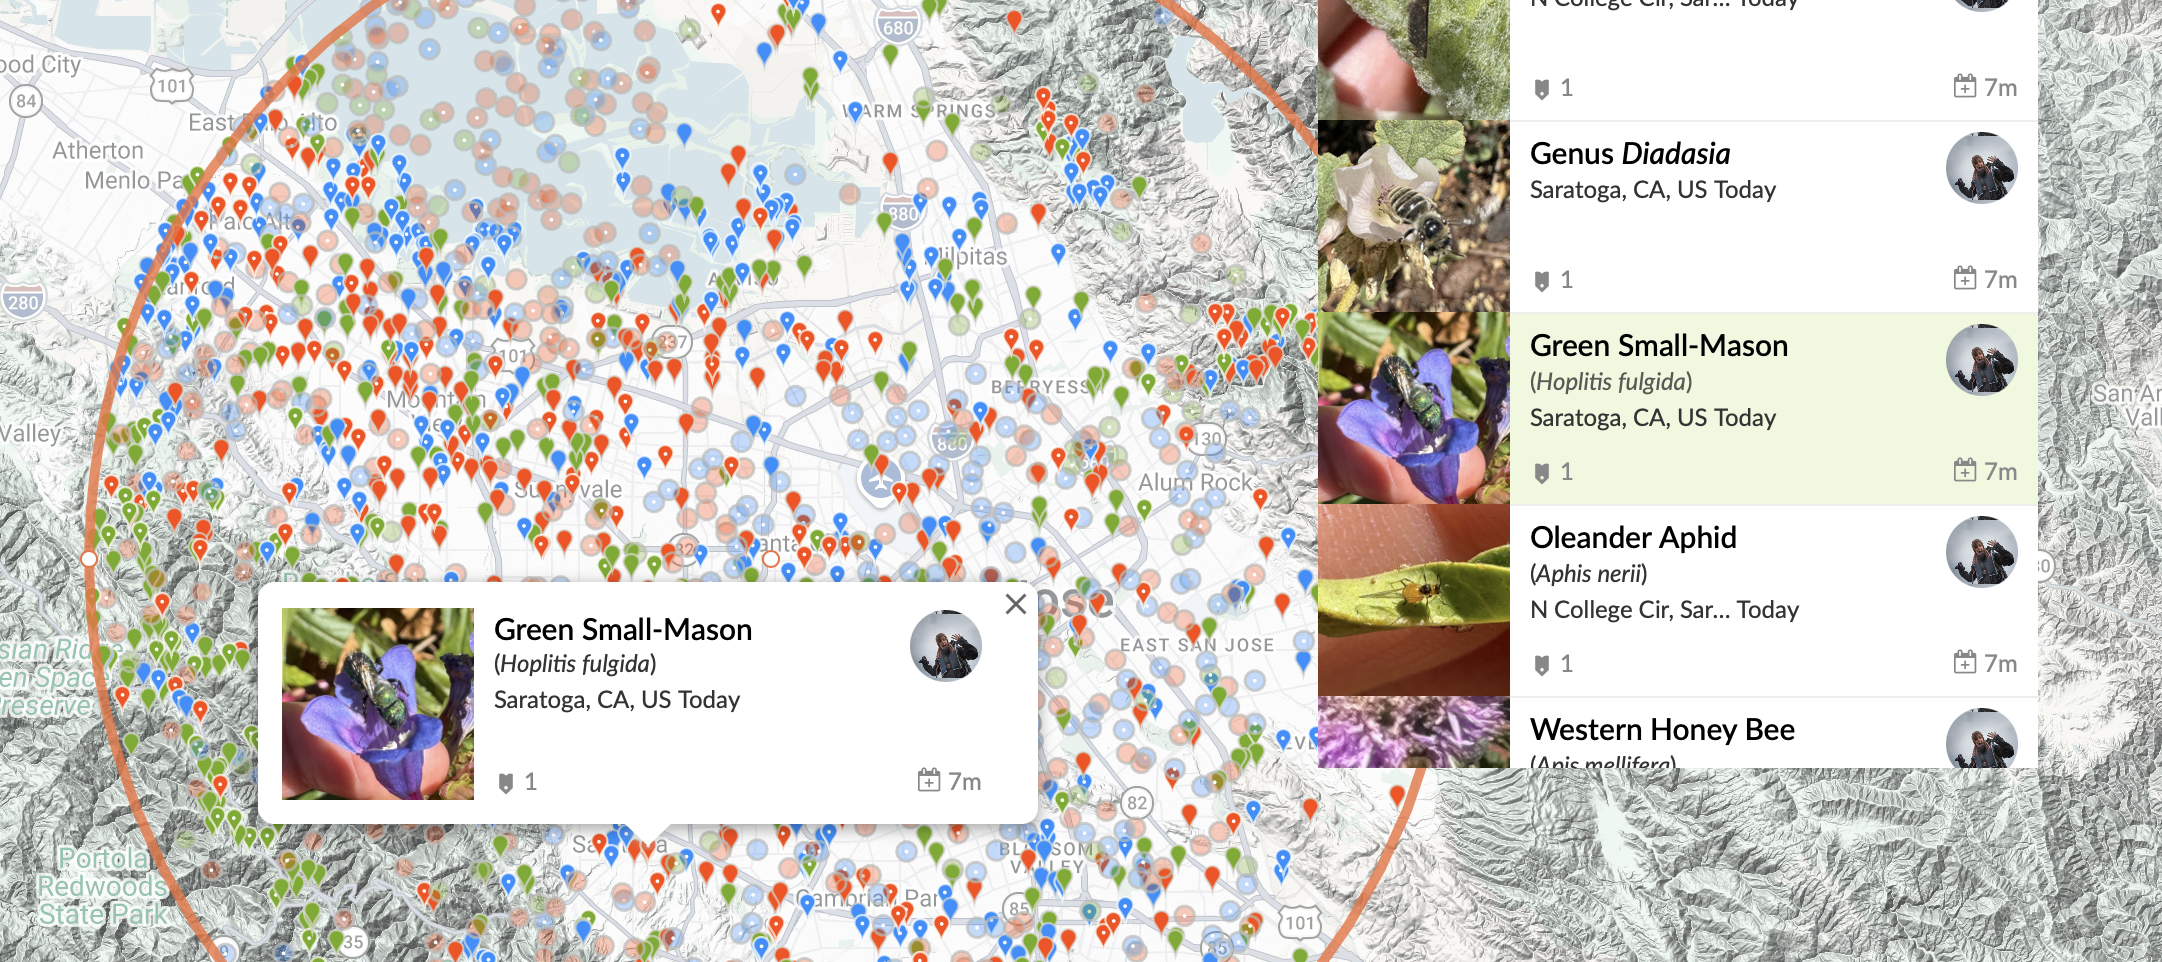
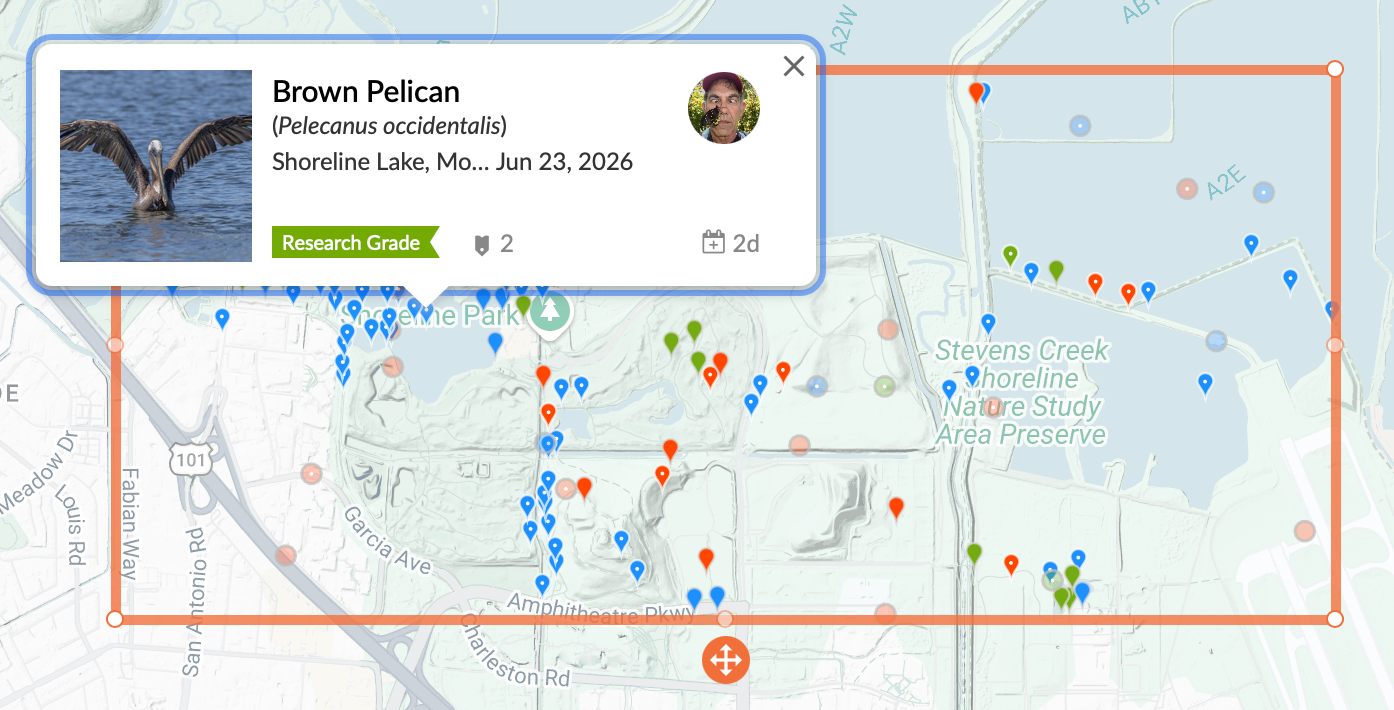
This part is probably the most fun. On the map, look for areas with a healthy mix of colored observation pins. A diverse set of observations usually means there’s plenty to discover there. You can scroll through the observations in the panel on the right and hover over them to see where each one was found, or click directly on a map marker to open the full observation.
Pay attention to the quality grade of the observation. If it's Research grade, that means it has been independently identified by enough members of the iNaturalist community that the species identification is probably accurate. Casual observations are less certain, basically a guess.
One feature I particularly appreciate is geoprivacy. If someone chooses to obscure the location of an observation, iNaturalist randomly offsets the displayed coordinates within a small radius, which protects the privacy of the poster. Details on what exactly the app does to accomplish this can be found at this link. Observations with geoprivacy on are light colored circles, not the typical map pin shape, but they're still going to be close enough to the location for our purposes.
t your specific location, you can choose to make it a private location, and iNaturalist will select a random location that is within a small radius of you and use those coordinates instead. They have the specific details of this anonymization process here.
Selecting a compelling spot
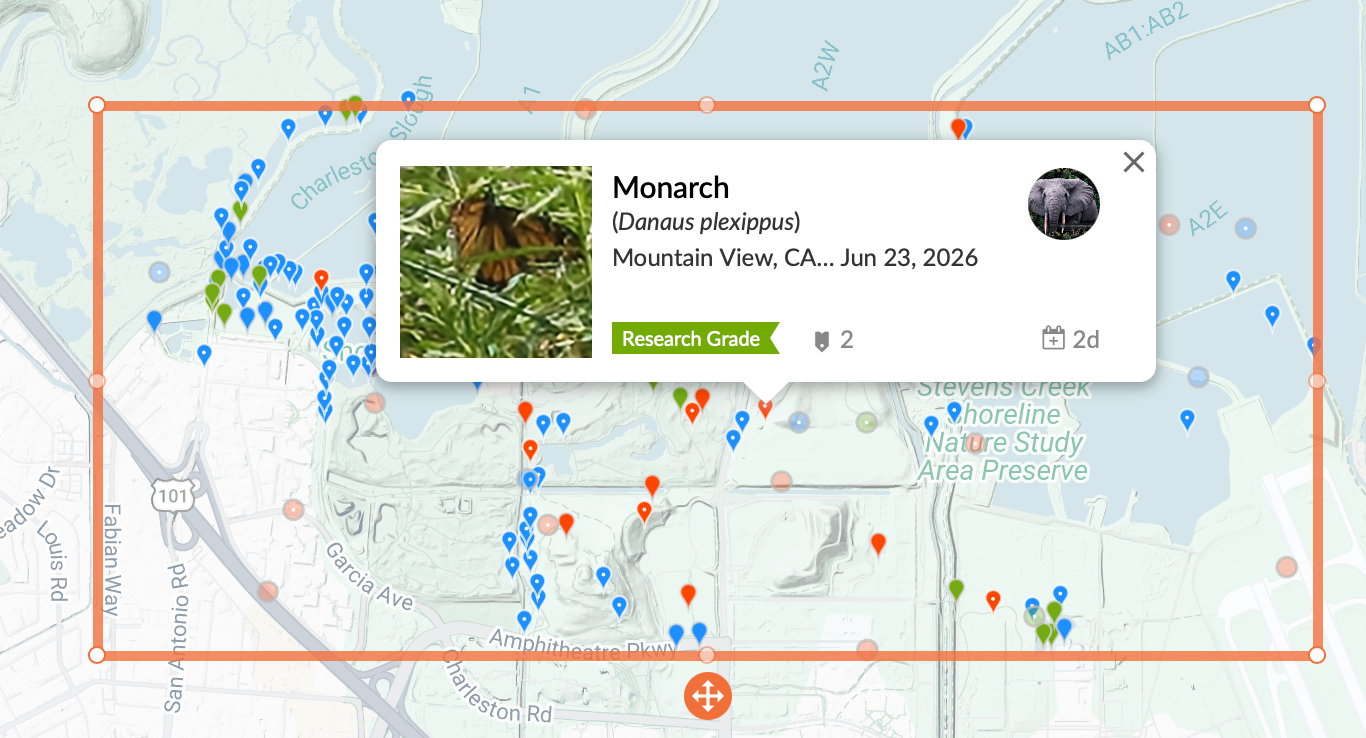
Typically, for something like an art picnic, what I will do now is look for a place that has a good blend of things going: birds, interesting plants, and some sort of landscape feature. You can identify this by first zooming in on the area and finding a spot with a mix of different colors of pins. Then, click "redo search in map" so that you can focus on the observations and confirm they are things you would be interested in seeing.
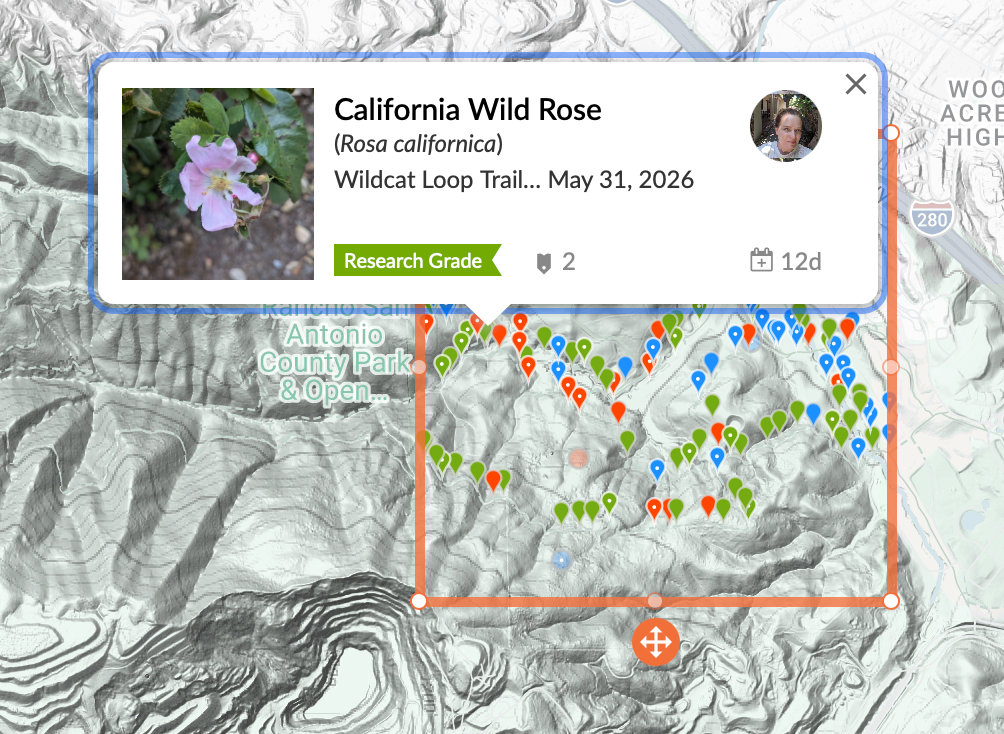
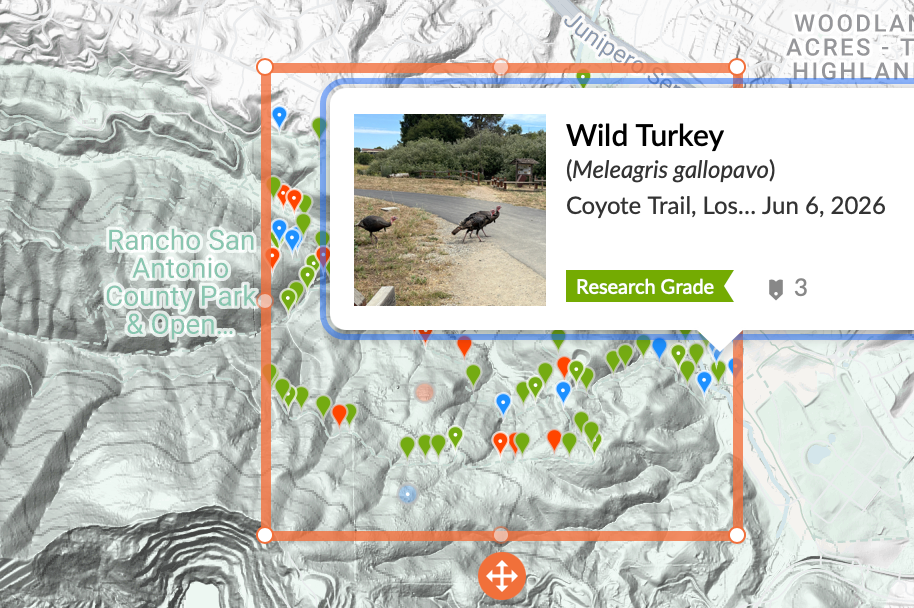
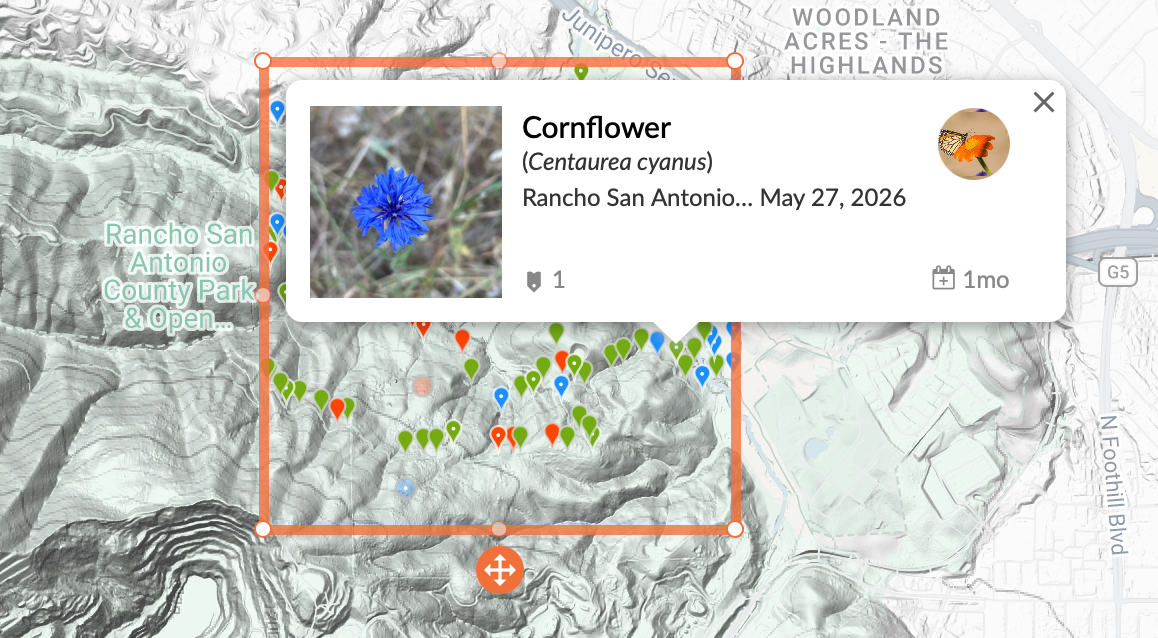
Rancho San Antonio Preserve observations
For example, earlier in June, I identified Rancho San Antonio Preserve as a good option for our picnic because it had observations of turkeys, blooming wildflowers, and hills. Now, later in June, I think a place like Shoreline would be interesting, as it has a mix of water birds and little songbirds, cypress trees, and the lake.
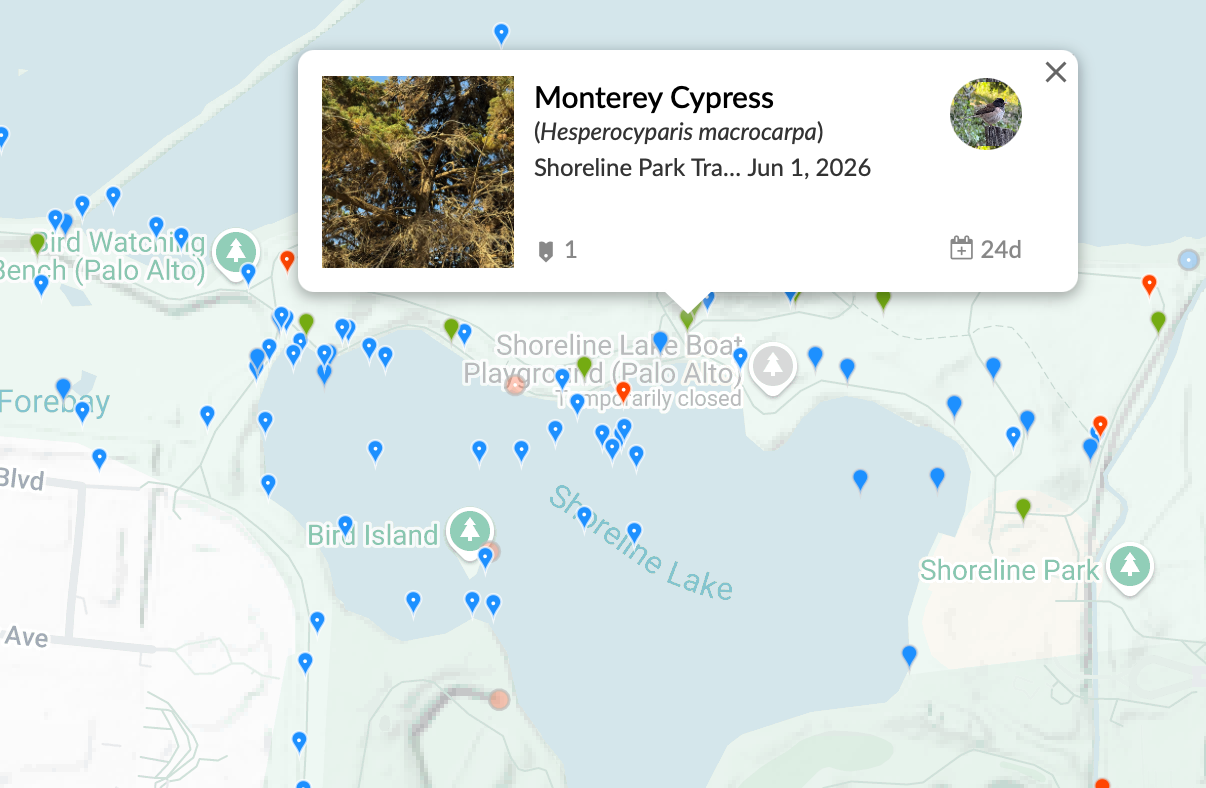
Shoreline Lake observations
Now, what you want to do is decide time of day. For me, the natural options when looking at nature are: dawn, morning, afternoon, evening, and dusk. Typically, animals that have a routine or a special time of day will fall into one of these categories.
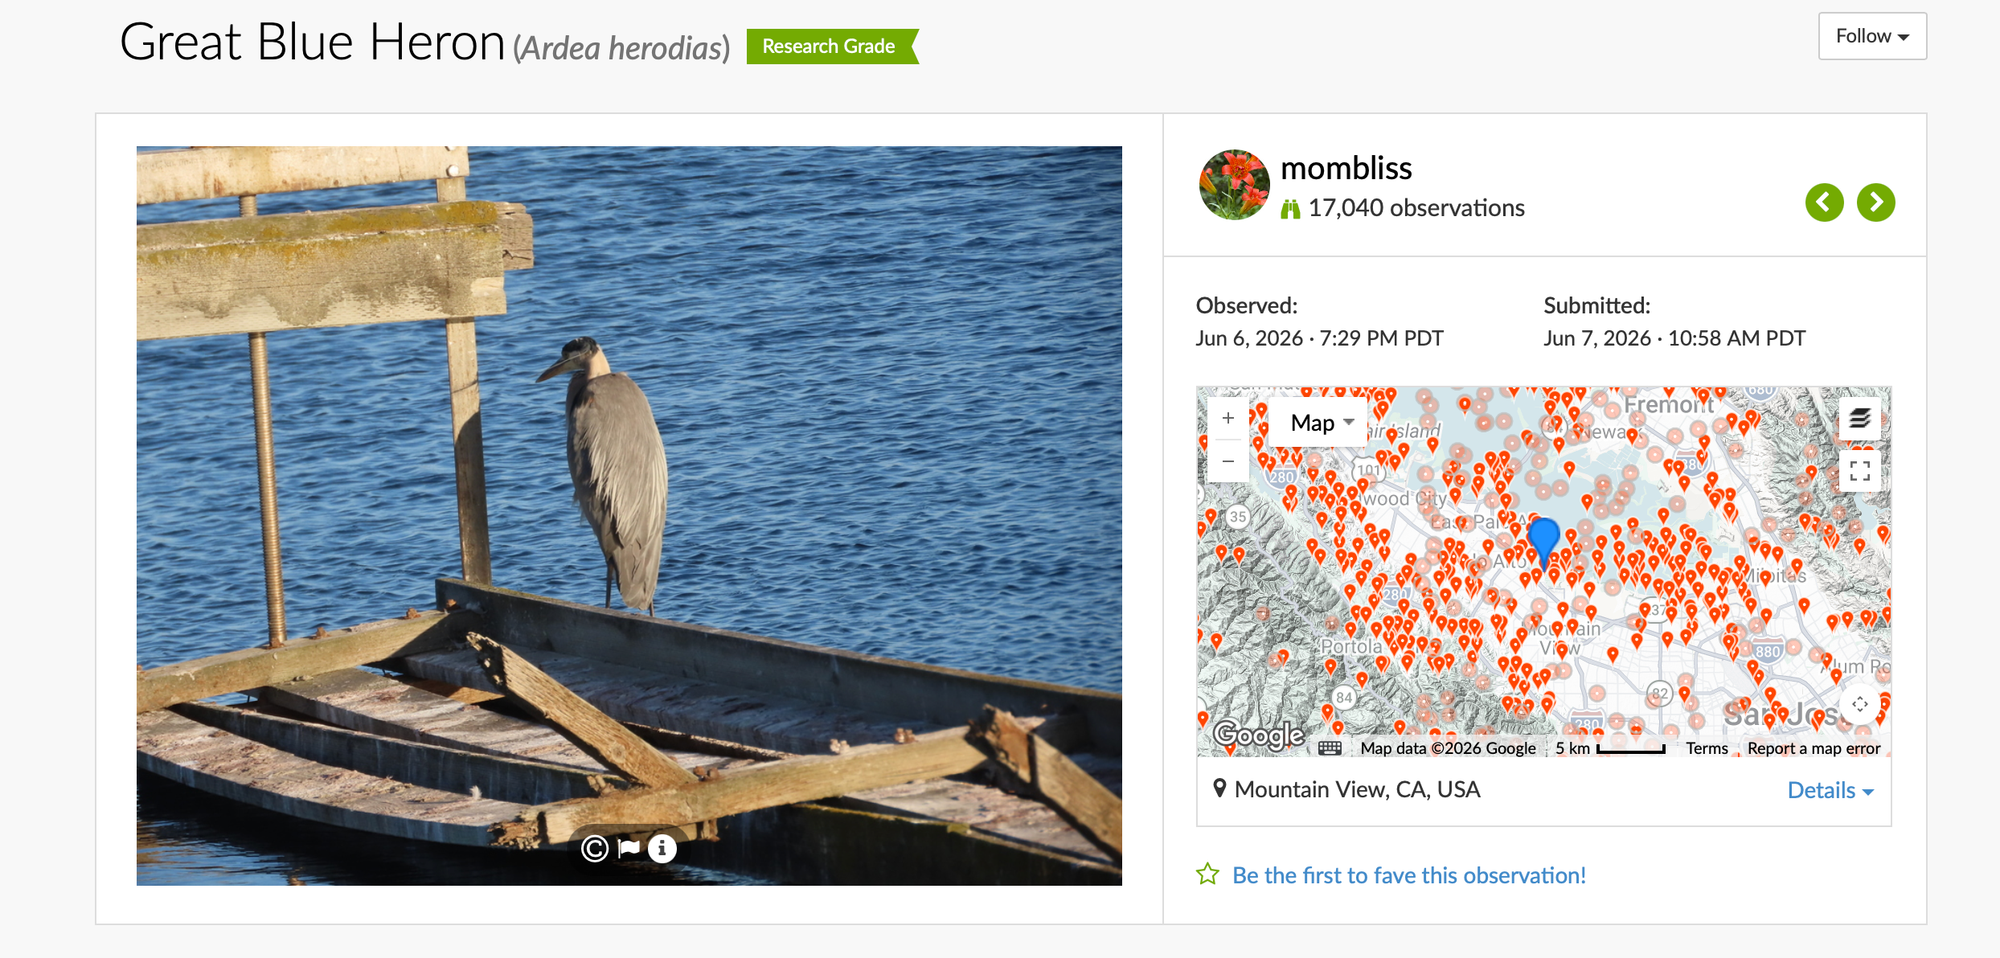
Unfortunately, iNaturalist doesn’t let you filter observations by time, so you’ll need to click into the observations that interest you and look at the Observed timestamp. That’s the important one—the upload time isn’t very useful because many people don’t upload their photos until hours or even days later.
After you’ve identified a location and a time when the wildlife you’re interested in is active, you’ve stacked the odds in your favor. All that’s left is to send out the invitations and hope nature cooperates.
Species-first
Curious about a specific animal?
Let's take an example and say I'm interested in seeing the silvery blue butterflies in the Presidio.
Find a Location
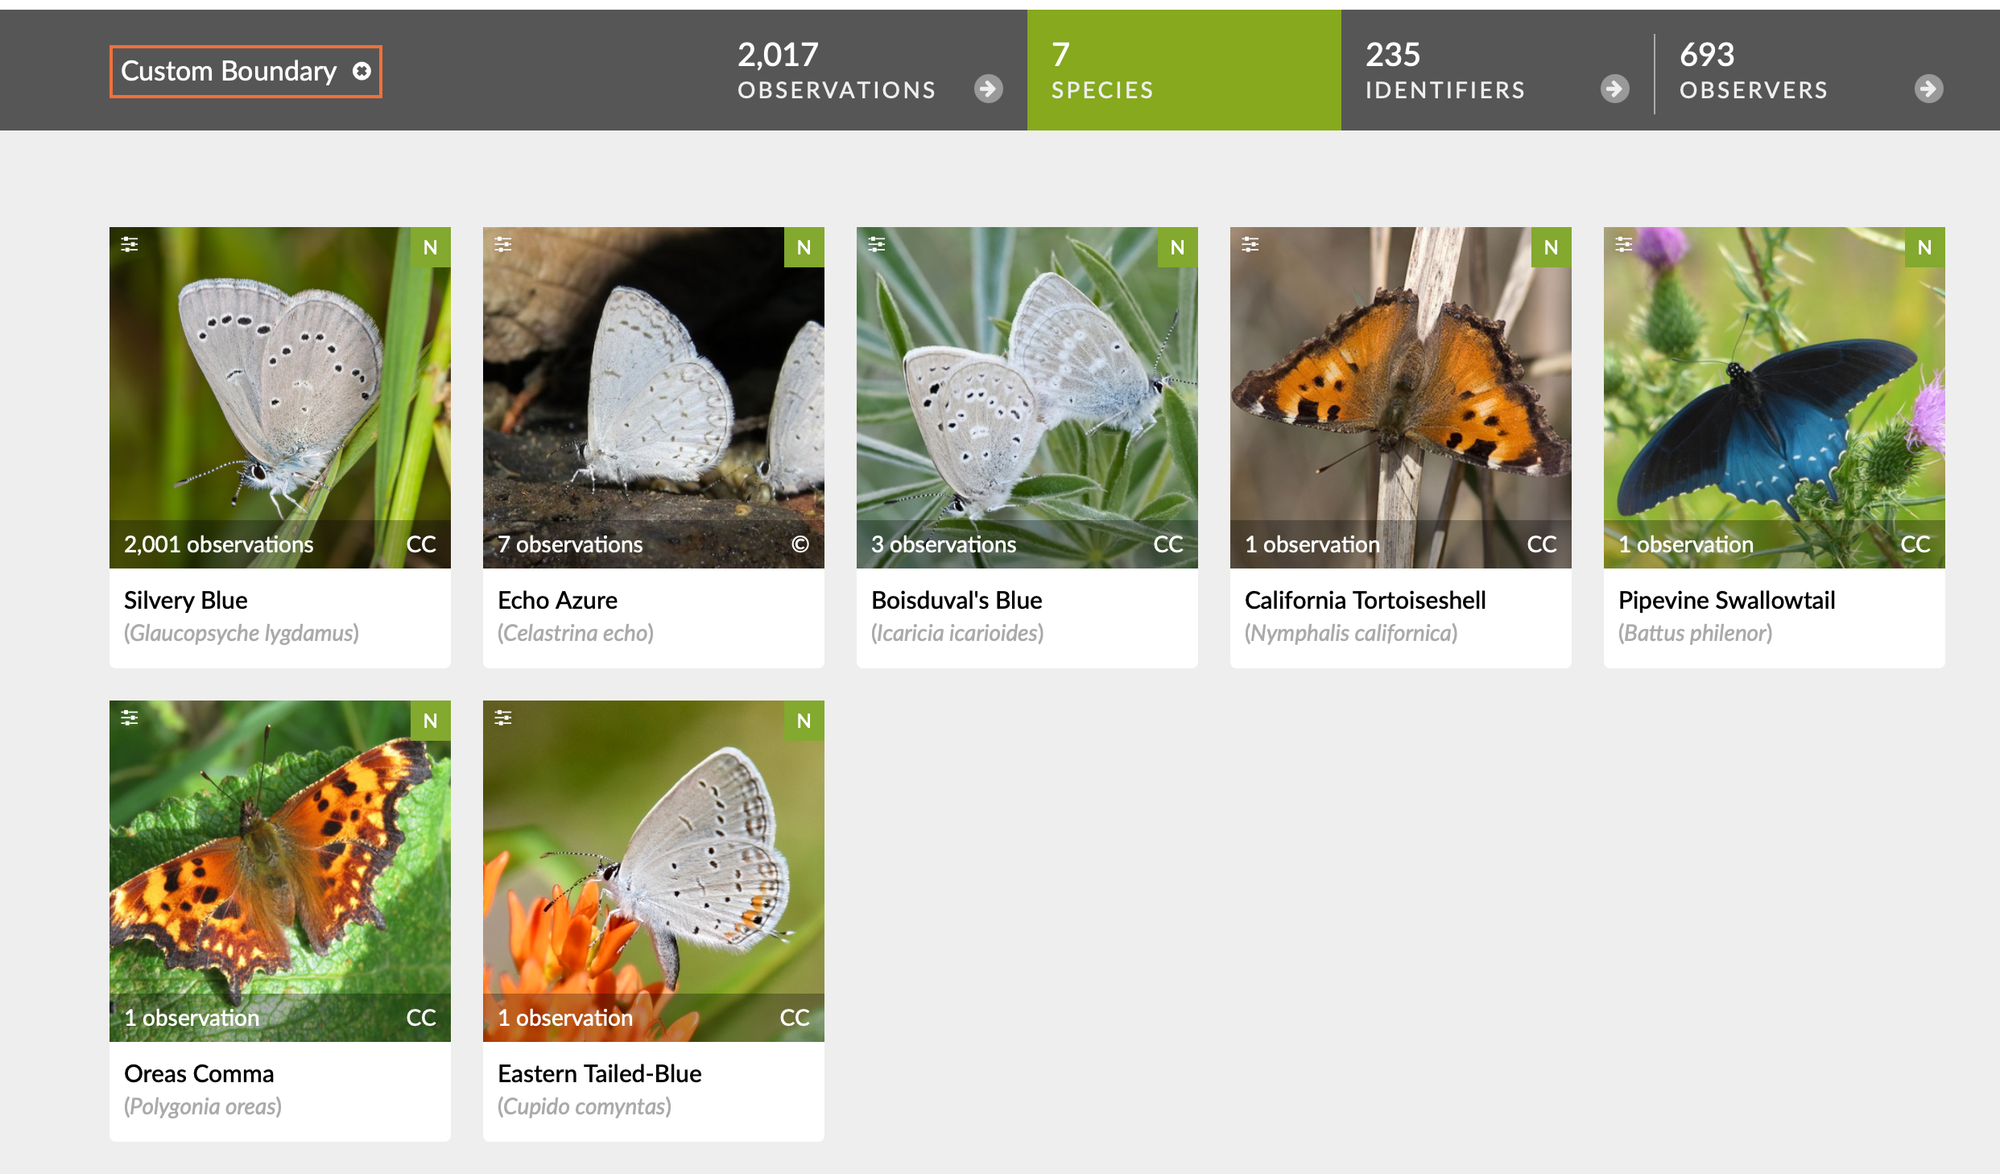
Just like before, start by entering your general area of interest into the location search bar. Open the Filters menu, type the common or scientific name of your species into the search box, and select the correct match. When you click through to the species page, iNaturalist will show you a map of every recorded observation.
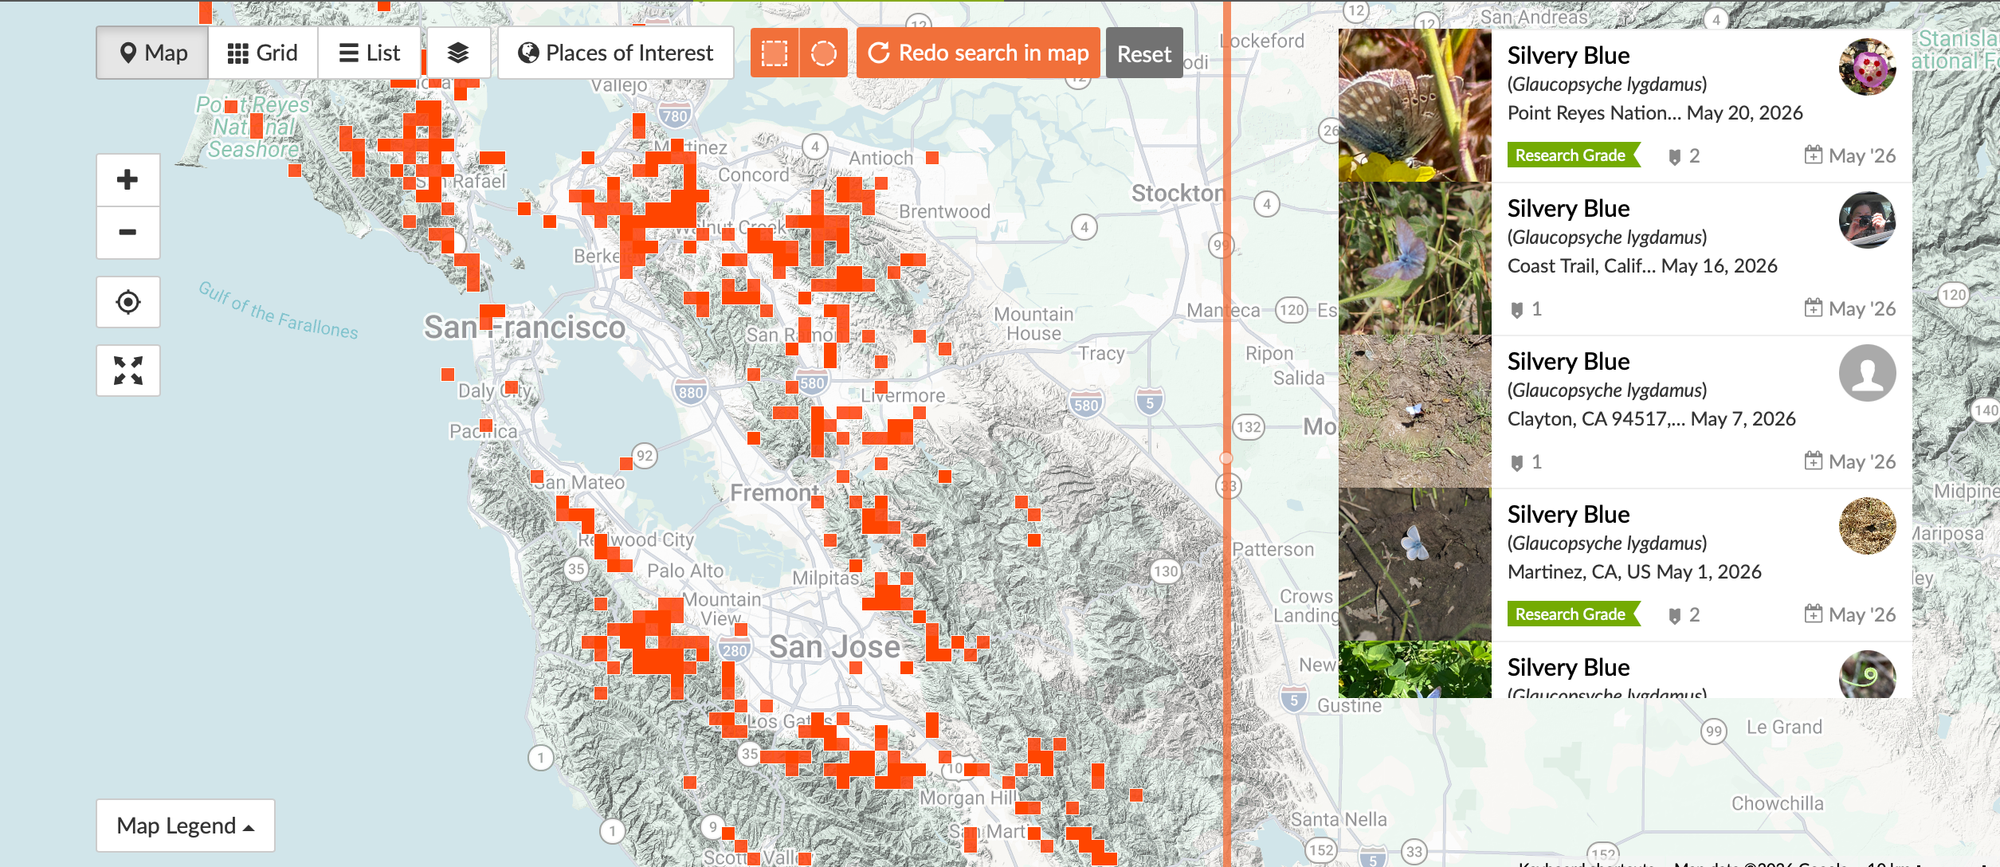

Looking at the clusters of observations on this map, if I simply wanted to see a silvery blue butterfly anywhere, the foothills west of Mountain View look promising. Since my goal is specifically to find them in the Presidio, though, I’ll zoom into that area and click Redo Search in Map.
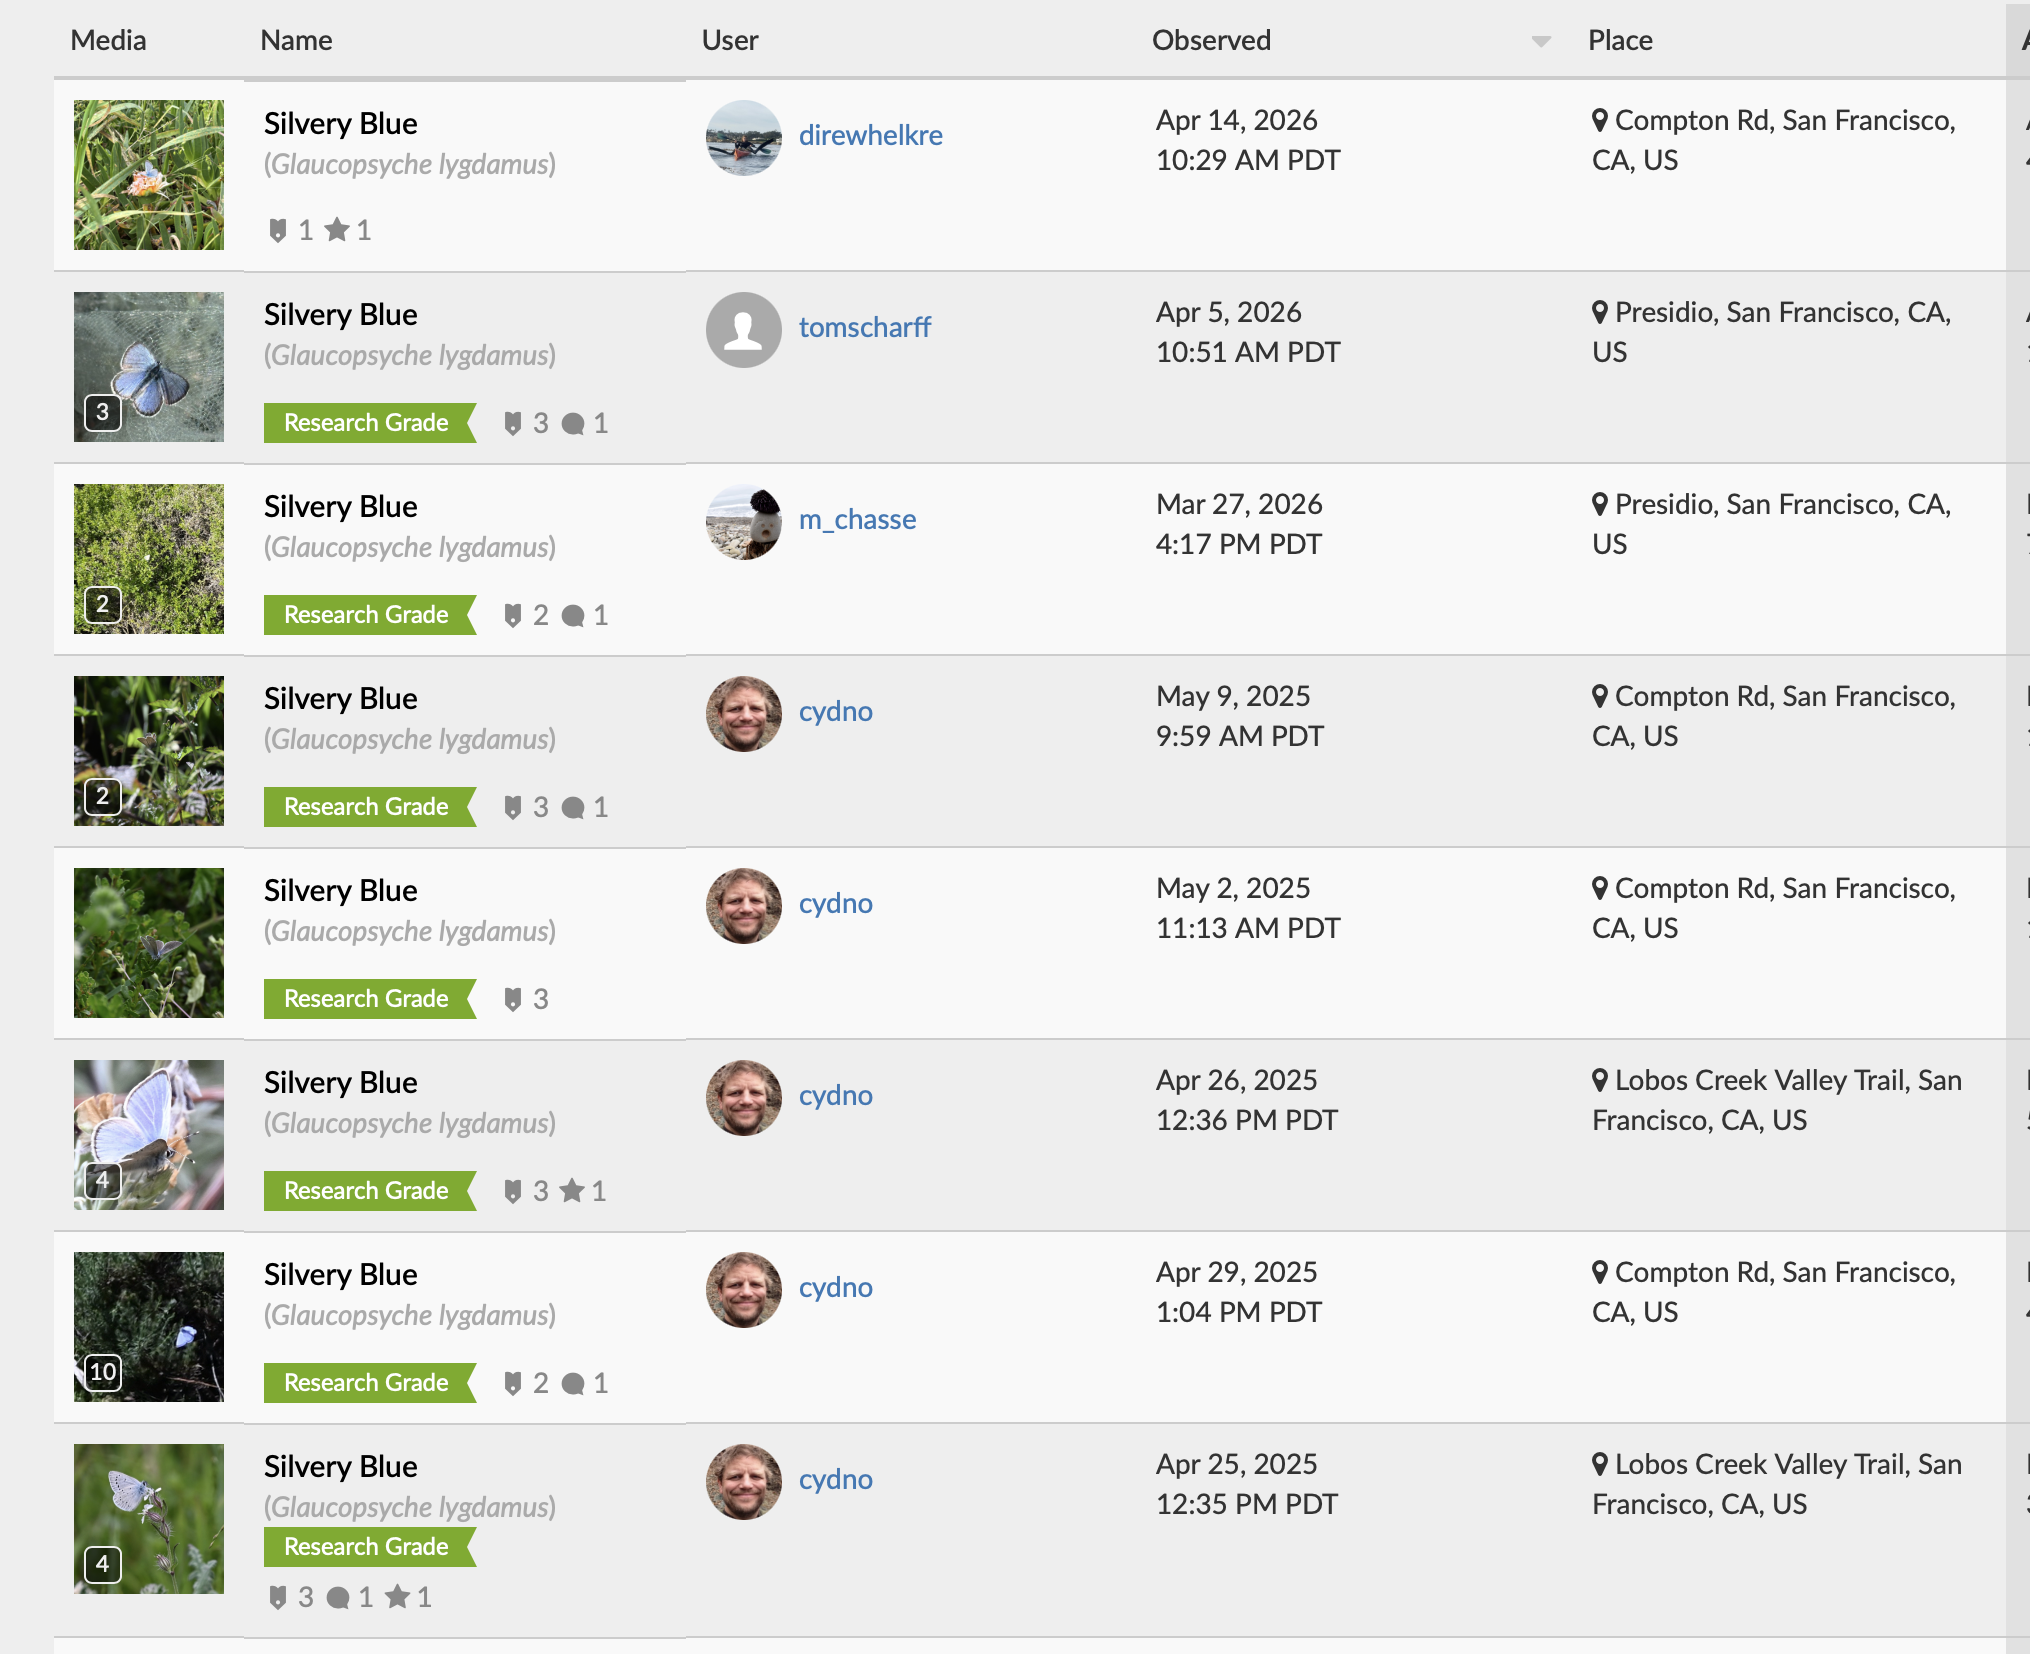
Keep narrowing the search area until you’re looking at roughly fifty observations or fewer. At that point, switch from the map to the observation list, where it's easier to spot patterns in month and time of day. The first thing I look for is when people are finding the species. For the Presidio, most silvery blue observations cluster in April and May, making those the best months to plan a visit.
Follow the Clues
The second thing I look for is bias in the data. If every observation was uploaded by the same person on the same day, you’re probably looking at the results of a single outing rather than a representative sample. On the other hand, if many different observers independently report seeing the species over several weeks, you can be much more confident that you’ve found a genuine seasonal pattern.
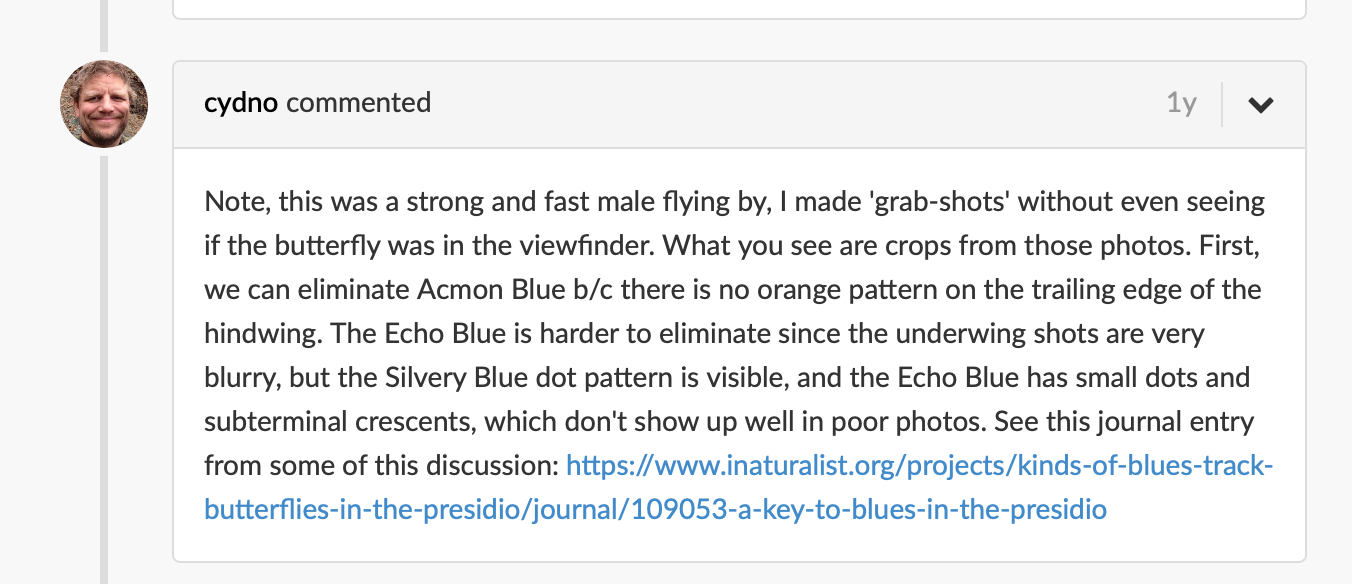
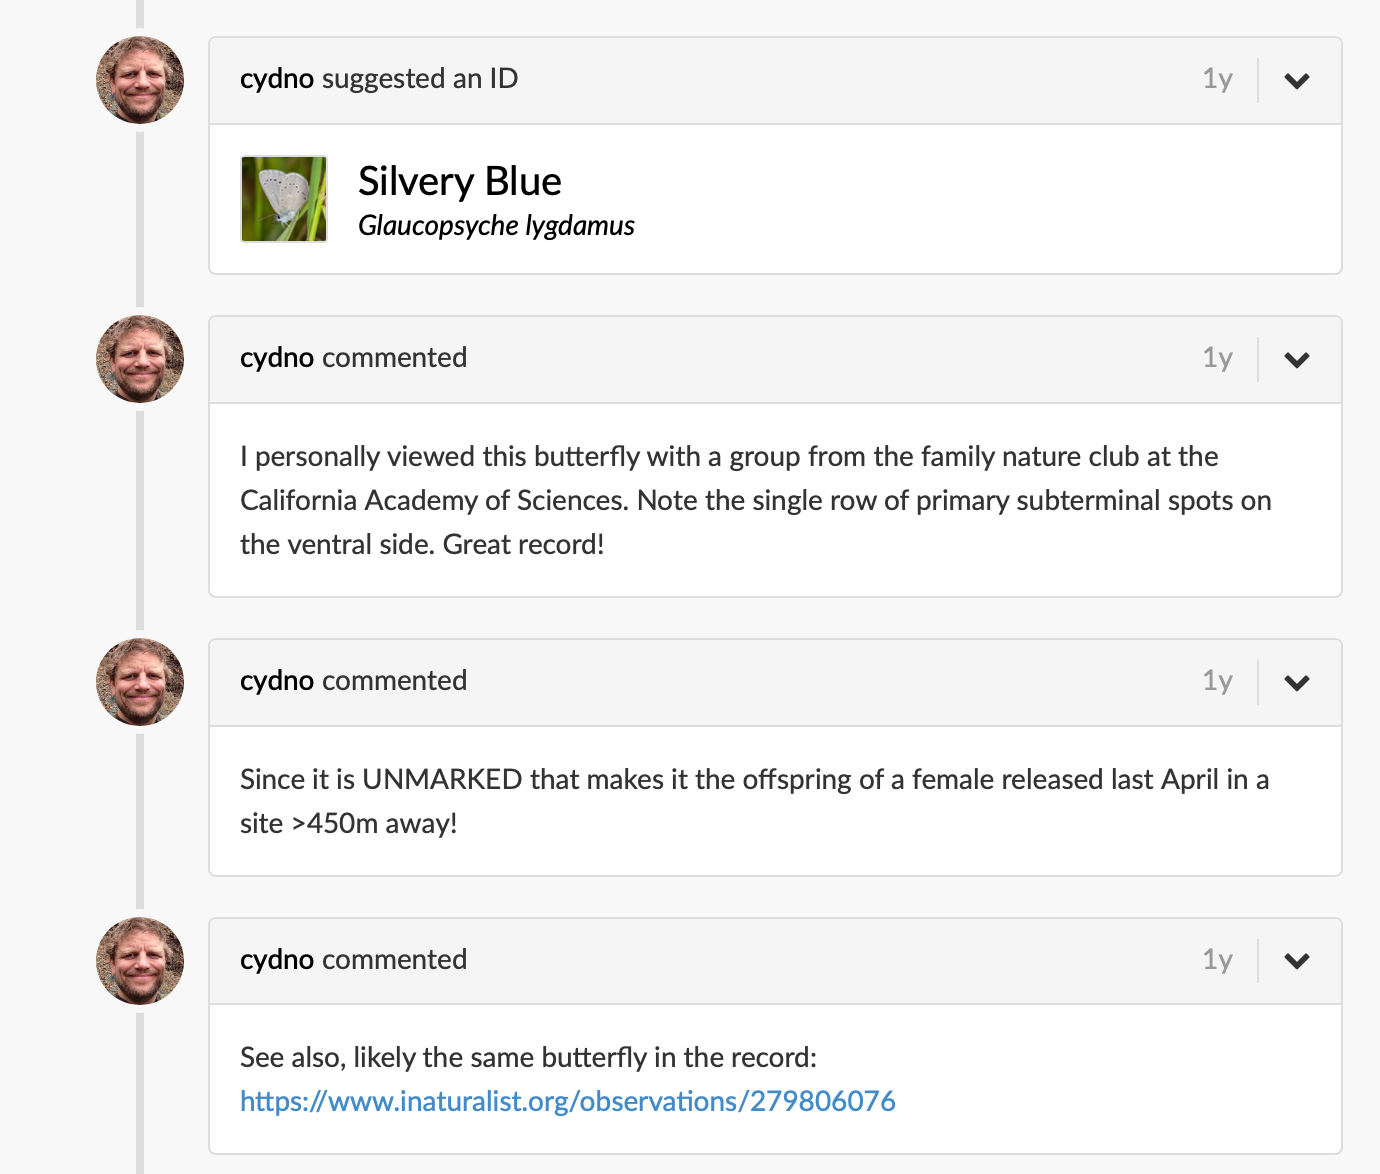
useful comments about silvery blue butterflies
The comments are so useful. Whenever an observation has a comment, it's worth clicking in and checking it out. People often include field notes that never make it into the structured data. For example, while looking through these observations, I found a link to an article on identifying blue butterflies in the Presidio—a resource I almost certainly wouldn’t have discovered through a regular web search.
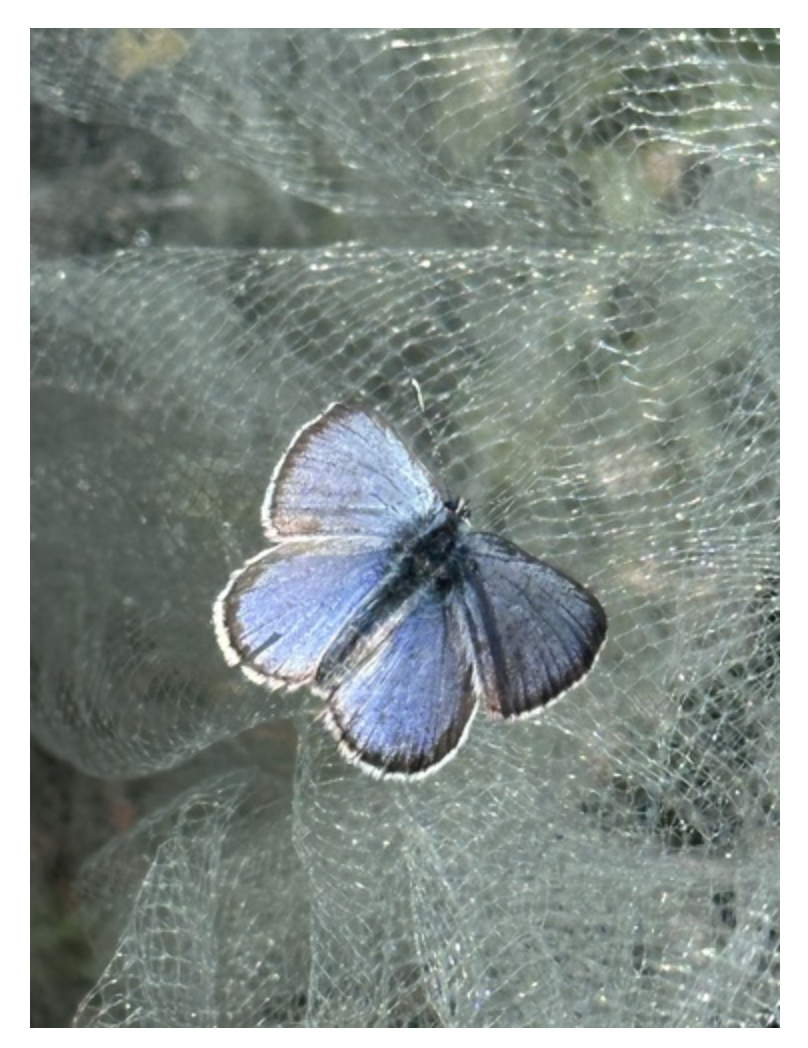
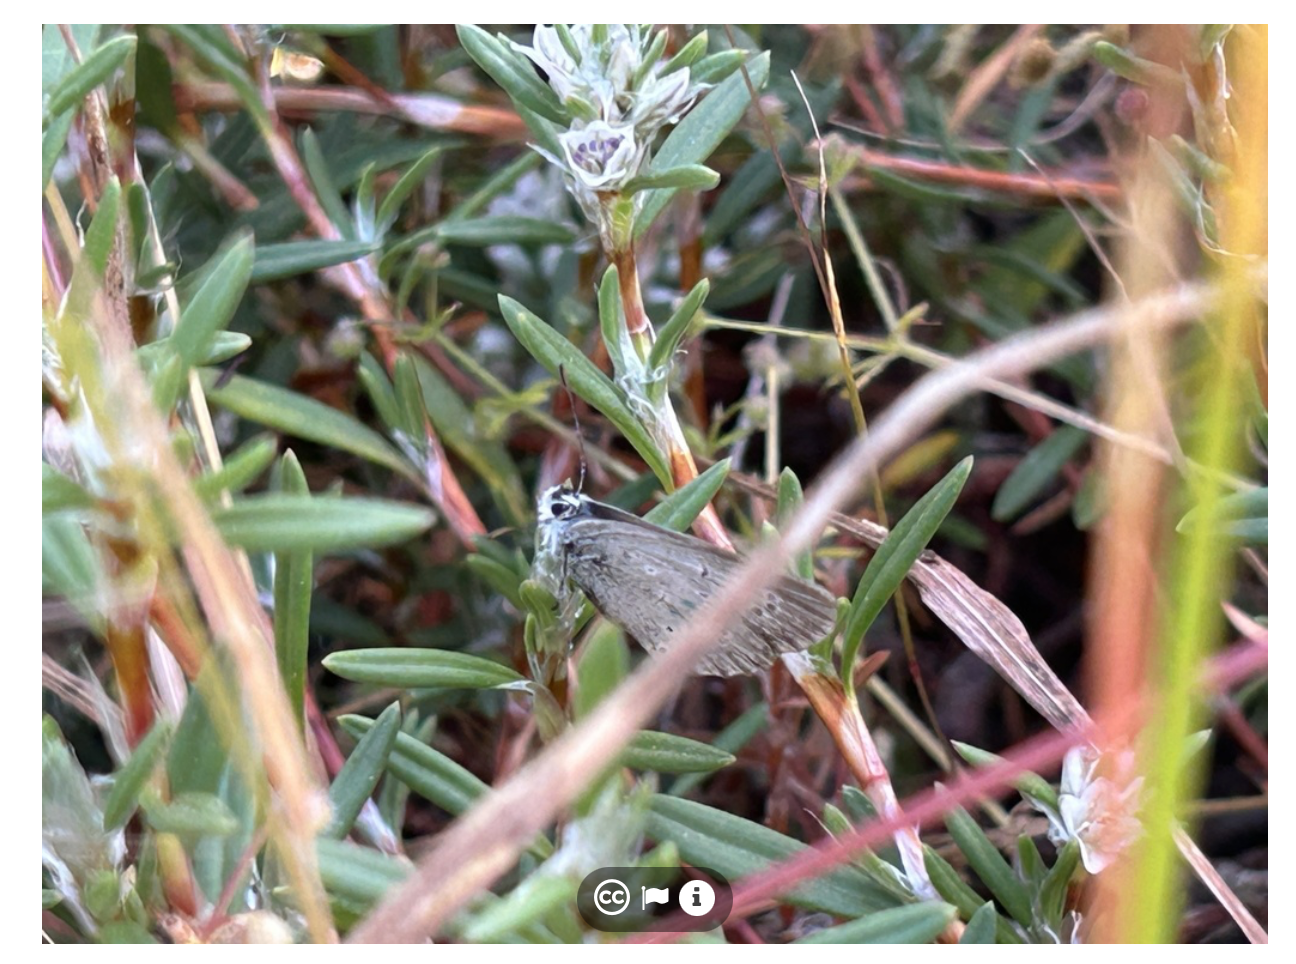
Left: Photo 633869302, (c) tomscharff, iNaturalist observation 347631405. Right: Photo 501220177, (c) harmlee, iNaturalist observation 279126977.
Finally, don’t ignore the photographs themselves. They can reveal subtle hints about how to find your target. In this case, many of the butterflies were photographed around low shrubs, and a surprising number of individuals resting quietly on flowers or leaves were photographed in the morning. That suggests an early visit may offer a better chance of spotting them before they’ve warmed up and become more active.
By the time I leave iNaturalist, I have much more than a pin on a map. I know where to go, when to go, and what to look for once I get there. Unfortunately, by the time I did this research it was already late June. As you can see, that's well past the peak season for silvery blues in the Presidio. Instead of making the drive and hoping for the best, I’ve made a note to return next April, armed with a map of the most productive areas, the habitats they seem to prefer, and the time of day that gives me the best chance of success. That’s a much better outcome than spending an afternoon searching in the wrong place at the wrong time.